Transform Your Heels into Vintage-Inspired Masterpieces – A DIY Guide

What You'll Need:
·
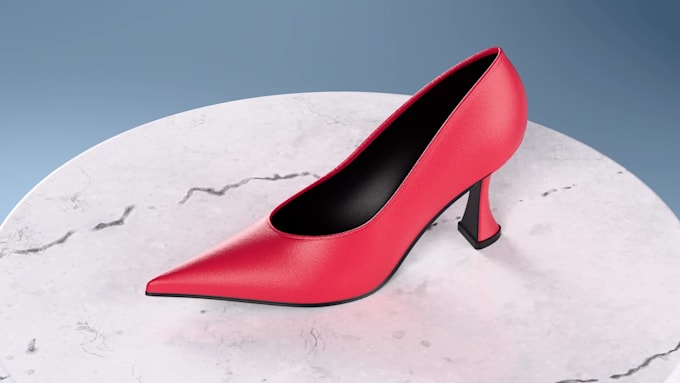
A pair of plain heels: Choose a style that lends itself to vintage looks (e.g., pointed
toe, classic pump, t-strap).
·
Vintage-inspired
materials: Consider things like:
o Lace
o Decorative buckles or clips
o Metallic paint or leafing
·
Strong adhesive: Suitable for fabric and/or embellishments (e.g., fabric glue,
E6000).
·
Scissors
·
Needle and
thread (optional): For more secure attachments.
·
Craft knife
(optional): For precise cuts.
·
Paintbrushes(if using paint or adhesive for larger areas)
·
Gloves (if
using strong adhesives or paints)
·
Inspirationphotos of actual vintage designer heels: To guide your design.
Important Note:
This tutorial focuses on embellishing existing heels. Modifying the
structure or creating heels from scratch is beyond the scope of this guide and
requires specialized skills and equipment.
Steps:
Step 1: Gather
Inspiration and Plan Your Design
Look at photos of
authentic vintage designer heels from the era you admire (e.g., 1920s Art Deco,
1940s peep-toe, 1950s stilettos). Decide on the specific elements you want to
incorporate into your design. Sketch your ideas if it helps.

Step 2: Prepare Your Heels
Clean your heels thoroughly with a
damp cloth and let them dry completely. This will ensure good adhesion for your
materials.

Step 3: Applying
Fabric or Ribbon (Optional)
If you want to change
the overall look of the shoe, you can cover it with fabric or ribbon.
·
Fabric: Cut
the fabric to the approximate shape of the shoe pieces (vamp, sides, heel). Apply
adhesive to a section of the shoe and carefully smooth the fabric over it,
working in small sections to avoid wrinkles. Trim any excess fabric, leaving a
small margin to fold and glue underneath for a clean edge.
·
Ribbon:
Wrap ribbon carefully around the shoe, securing it with small dots of adhesive
as you go. Overlap the edges slightly for a neat finish.

Step 4: Adding Lace Appliqués or Overlays
Lace can add a delicate
vintage touch.
·
Appliqués:
Cut out sections of lace and position them on your heels. Apply a thin layer of
adhesive to the back of the lace and press firmly onto the shoe. You can also
stitch the lace on for extra security.
·
Overlays:
If you want to cover a larger area with lace, carefully cut the lace to the
shape of the shoe section. Apply adhesive evenly and smooth the lace over the
surface. Trim any excess.

Step 5: Attaching Embellishments (Pearls, Gems, Buckles)
Carefully position your
pearls, gems, or buckles on the heels according to your design.
·
Small
embellishments: Apply a small dot of strong adhesive to the back of each
embellishment and press it onto the shoe.
·
Buckles or
clips: Some may have prongs or loops that can be inserted into the shoe
material or glued securely.

Step 6: Adding
Straps or Details with Ribbon
You can create vintage-inspired
straps or decorative elements with ribbon.
·
Ankle straps:
Cut a length of velvet or satin ribbon and attach it to the inside of the shoe
with strong adhesive or by stitching. Ensure the placement is comfortable and
secure. You can add a small buckle or snap for closure.
·
Bows or
rosettes: Create small bows or fabric rosettes and attach them to the toes
or sides of the shoes.

Step 7: Applying Paint or Metallic Leafing (Optional)
For a more dramatic
vintage look, you can paint parts of the shoe or apply metallic leafing.
·
Painting:
Use appropriate paint for the shoe material (e.g., leather paint, fabric
paint). Apply thin, even coats and let them dry completely between
applications.
·
Metallic
Leafing: Follow the instructions for your specific leafing kit. This
usually involves applying an adhesive, letting it become tacky, and then
applying the metallic leaf.

Step 8: Finishing and Drying
Once you've added all
your embellishments, allow the adhesive to dry completely according to the
manufacturer's instructions. This may take several hours.

- Durability:
Embellishments attached with glue may not be as durable as factory-made
shoes. Handle your creations with care.
- Comfort:
Ensure that any additions do not make the shoes uncomfortable to wear.
- Ethical Considerations: Do not attempt to replicate designer logos or
branding. This is illegal and unethical. Your goal is to create vintage-inspired
shoes, not counterfeit designer items.
By following these steps and using
your creativity, you can transform a plain pair of heels into a unique,
vintage-inspired accessory. Remember to prioritize safety when using adhesives
and sharp tools. Good luck!
DIY Bohemian Pearl Hair Headdress: Step-by-Step Spring Bridal Wreath Guide
DIY Denim Tote Bag: Upcycle Your Old Dress into a Stylish Eco-Friendly Bag
How To Make A DIY Denim Bucket Hat: Repurpose Old Jeans into a Stylish Hat
How To Make DIY Knotted Headband for Teens: Easy Step-by-Step Sewing Tutorial
🥿 Explore Top Shoe Designers on Fiverr
Transform your heels into true fashion statements with help from professional designers on Fiverr. Here are 5 talented gig artists to check out: